Exhibition & Gallery Framing Hints
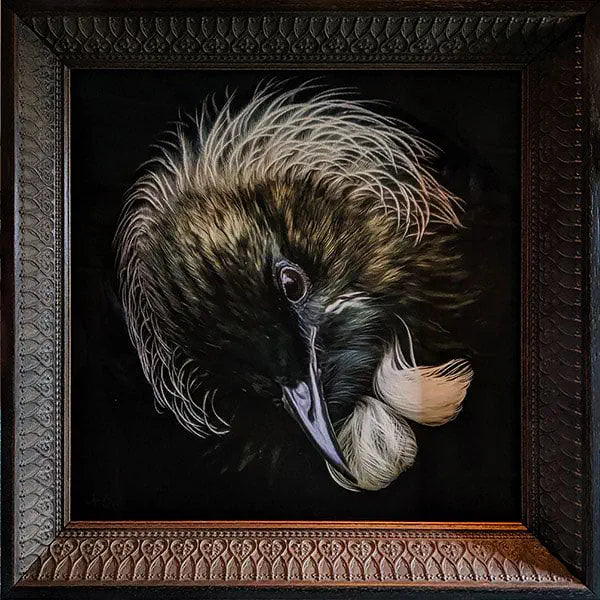
The feature image shows "Portrait of a Tūī" in a ornate box frame and UltraVue anti-reflective glass.
[This is an article for budding artists who are taking the plunge to exhibit their work, though art buyers might also be interested in what goes on behind-the-scenes of an exhibition. Also take a read of my art-print framing hints.]
So you've taken the plunge and agreed to do an exhibition - congratulations! One of the first major decisions is framing. If you've not done it before, it can be quite intimidating. Hopefully this blog will take some of the uncertainty out of it, or at least will help you know which questions to ask.
My key take home message? It is important to see the frame not merely as a vehicle for the print but as an extension of the art itself.
My key take home message? It is important to see the frame not merely as a vehicle for the print but as an extension of the art itself.
Exhibition framing is a big decision, a big expense but it is also an investment. It pays to take a long view and not worry too much about recouping your costs in just one exhibition. Instead, look for and line up future opportunities to use your frames, including galleries, personal customers, and group exhibitions and competitions.
Why frame? For exhibitions its usually essential if you're printing on paper (I'm mainly considering photo-artists here who deal with prints). You can hang paper prints but they risk damage. Galleries and stores usually like a couple of framed pieces even if you're mainly selling prints. Some customers are happy to frame their own prints, but many more find the thought of choosing a frame inconvenient and even formidable, especially if they can't visualize the results. Many would very much like the artist's choice (and this might come as a surprise) because they feel confident that we know what we're doing and that we have an artistic vision for the piece. If nothing else, having something tangible in front of their eyes helps them visualize what it will look like in their home.
Why frame? For exhibitions its usually essential if you're printing on paper (I'm mainly considering photo-artists here who deal with prints). You can hang paper prints but they risk damage. Galleries and stores usually like a couple of framed pieces even if you're mainly selling prints. Some customers are happy to frame their own prints, but many more find the thought of choosing a frame inconvenient and even formidable, especially if they can't visualize the results. Many would very much like the artist's choice (and this might come as a surprise) because they feel confident that we know what we're doing and that we have an artistic vision for the piece. If nothing else, having something tangible in front of their eyes helps them visualize what it will look like in their home.
Video of my latest exhibition showing a collection of TinyArt pieces at the beginning and end, tūī pieces framed with an ornate Italian-style boxy black frame (to suit this elegant, well-dressed bird), and the kākā pieces framed with a chunky, rustic brown frame (to suit this autumnal-shaded gregarious bird). Framing by Edges Art + Framing. Please excuse my poor videography skills!
My framing background and experience
To give you some idea what experiences have led to my opinions about framing, over the past couple of years I've participated in and organized a number of solo and group exhibitions and have put framed pieces into galleries. I was lucky enough to win a weekend course with The Learning Connexion and chose their framing course. I was also fortunate to have an exhibition at Edges Art + Framing and spent a couple of days getting a behind-the-scenes look into what's involved with framing and time to consider the choices.
From these experiences, I created the Tiny Art project where I mount tiny versions of my prints in tiny frames that Edges make, which has allowed me to experiment with many types of frames and framing techniques.
In exhibitions, I've used stretched canvas, simple black frames and white mats that were professionally made, simple black frames and white mats that were purchased online, slim rustic wooden frames and glass, TinyArt pieces that covered a wide range of frame styles, and now large rustic frames or ornate Italian-style frames both with anti-reflective glass. For pieces going into galleries, on occasion I've pulled out all the stops with ornate frames and internal champagne gold filets with anti-reflective glass - expensive but they look stunning and are hard to resist! So over time I've gathered many hints and tricks.

Four TinyArt tūi pieces surround an ornately framed medium-sized tūī print, in the NZ Academy of Fine Arts shop.
Framing with exhibitions and reuse in mind
In your exhibition planning, start discussions with your framer early on - ideally a couple of months or more beforehand. It can take some time to decide on the specifics, and even once decided, the framer will need to order in supplies and will also need to slot you into their schedule. There are enough last-minute things to sort with an exhibition that you don't also want to be stressing about framing too.

Reusing frames at the NZ Art Show 2018 (bird images on left). After this show, I decided to switch from plain glass to UltraVue - those reflections are a real detraction from viewing the art both in real life and when trying to photograph them. (Photo by Linton Miller)
How to keep costs down?
Find a local framer you click with and do all your business with them. The more they know and understand you and your art, the more help they will be to you. Many framers will offer artists a discount in the anticipation of large orders, ongoing business, and customer referrals.
Consistent print sizes
Have consistent sizes and aspect ratios for your prints so you can reuse frames with new prints and so your framer can make the same frame in bulk.
Making your own
Unless you have access to all the gear and the space, and unless you enjoy it, making your own frames is not cost effective, especially once you add in your time. Most of the cost of framing is in the materials rather than the labour. But you might be able to make some savings if you do your own mounting. Mounting does not need nearly as much specialist equipment. You may or may not want to cut your own mats. Cutting your own is doable but it's much harder to get a professional finish. A framer will have a precision cutter, and mats don't cost much to cut.
The most useful skill is learning how to hinge a print to a mat so you can reframe with a new print without having to return to the framers. All you need is hinging tape, a bone folder to emboss the tape down, paper framing tape to reseal the back of the picture, and a utility knife or scissors. I also find an air blower and a brand new microfibre cloth useful to remove dust.
The most useful skill is learning how to hinge a print to a mat so you can reframe with a new print without having to return to the framers. All you need is hinging tape, a bone folder to emboss the tape down, paper framing tape to reseal the back of the picture, and a utility knife or scissors. I also find an air blower and a brand new microfibre cloth useful to remove dust.
Buying ready-made or discount frames
You can buy ready-made frames online, and although they can be quite cheap, they are quite expensive for the quality of the materials used. They tend to feel flimsy and chip easily. If you go this route, you will need to learn how to mount the prints, but there are lots of examples on the internet. Many artists and photographers use the cheapest frames they can find from discount stores. Although sometimes a necessity due to time constraints and budget, they do not do your art justice and may also damage the print over time because they are not likely made with acid-free archival materials.
Vintage and recycled frames
Repurposing vintage frames is another option - check out second hand and charity stores, estate sales, garage sales, and the like. They usually need refinishing, it's unlikely you'll get matching frames, and the quality may not be apparent. I've had some success using metallic lustre wax on old frames to give them new life. You and everyone else are on the lookout for second-hand framing bargains so give yourself plenty of time to source them if you go this route.
Other cost considerations
To get more bang for your buck, consider trading off a cheaper frame for more expensive glass. Photo-art can look much better behind anti-glare glass as there are fewer distracting reflections. It also tends to look more painterly than photographic, if that's the style you're going for. It is more expensive, but I personally think it's worth it because the art looks better and is therefore more attractive to a prospective buyer. Although the framing is an extension of the art, you need to be able to see the art first and foremost.
When you are pricing your framed artworks, be sure to account for the gallery commission so that you cover the cost of the frame even after the commission is taken out. A painful mistake made by many. If you have an artist's discount, that saving helps cover the commission.
Adventures and advances in framing
-
Simple black frame with white mat and plain glass, purchased online, signed and editioned in the margin.
-
Same picture but with a frame chosen specifically for the piece, framed to the edge, and using anti-reflective glass. Because the photo is taken at an angle, there are some reflections, but face-on it looks fabulous - certainly much better than the previous photo (Photo by Linton Miller).
-
TinyArt piece where the print is embellished with a bronzed edge, float framed over "wallpaper" created from the original piece in an ornate frame with anti-reflective glass. The TinyArt project has allowed me to experiment at a smaller scale - I can't wait to do this piece BIG!


Creating frames so they can be easily reused
There are some things you can do to enable you to more easily reuse frames, thereby offsetting some of the risk. Unless you ask, your framer might use techniques that make it difficult to switch out the prints. Ask your framer to:
- Use two sets of D-ring hangers.
- One set of D-rings should be used to attach the string, rather than stapling the string to the frame. It is hard to remove the backing board and the print if you can't easily detach the string.
- The other set of D-rings should be attached approximately 5cm from the top of the frame, facing up, so they can be used with gallery hanging-systems. The picture will hang flatter against the wall if the hanging points are near the top of the frame.
- Use "bendies". The back of the picture is fastened in using metal points, and points can be either rigid or bendable. Both can be removed, but "bendies" are designed for reuse - all you do is bend them back to remove the print then bend them back into place.
- If you are using a mat, use archival hinging tape to mount the print on the back of the mat rather than mounting the print using adhesive-backed foamboard. This enables you to easily remove the print and switch with another. It is also an archival method causing the least damage to the print.
- If you're framing to the edge of the print, ask the framer to use a hidden mat or spacers within the frame rebate to ensure the print doesn't touch the glass.
- Even if you plan on reusing the frames if a picture doesn't sell, always finish the back with paper framing-tape. You don't want a customer to have an unfinished frame that could be more easily exposed to insects, dust, and mould. Nor do you want this to happen if you're storing your frames for a while.
- If you're storing your frames, do use cardboard protectors on the corners as the corners can easily be chipped. Your framed pieces should be delivered with these protectors - keep hold of them.
-
Attaching D-rings to a TinyArt piece. Use an awl to create a guide hole for screwing.
-
Protective cardboard corners. In this piece, I've used a filet and anti-reflective glass


Deciding on a frame
When it comes to deciding on a frame, there are a million-and-one possibilities and it is quite overwhelming. Initially I was ultra-conservative and opted for simple black frames and a white mat to try and appeal to more customers, but nowadays I throw caution to the wind and use a range of frames, sometimes quite ornate and sometimes with internal filets to give that extra special touch.
Nothing beats visiting your framer, getting their advice, and trying out lots of possibilities. There are also online framing services where you can upload photos and try out styles. It is hard to get a sense of the contours of the frame online though, so I do recommend looking at them in person if you can.
If you're framing for an exhibition, it is usually best to use the same frame style for all pictures for a consistent look-and-feel, though this might not be possible if you have an eclectic range of prints. For my first couple of exhibitions, I opted for identical frames, but this meant compromising for a couple of images where the frame wasn't ideal. In my current exhibition, I opted for two frame types as I had two distinct series in the exhibition.
-
So many choices of filet that can be used to elevate a frame into something unique and special.
-
Trying out possibilities at Edges Art + Framing. This frame is so gorgeous on its own, I use it without a mat or filet.
-
Rustic wooden frame with white mat, white margin left around print to show edition and signature. A safe choice.
-
This dark and moody print suited framing to the edge of the print with no visible mat and anti-reflective glass. Signed on the print itself.


Pros and Cons of three common framing methods
Frame with mat and white margin
A classic way to frame is to leave a margin of plain paper between the print and the mat. At the bottom goes your signature and edition number, and optionally the title and year.
Cons: matted prints are larger and use more frame mouldings and glass, so this makes them more expensive to frame. They can also look more "photographic" which might not be the effect you are looking for with your art.
Pros: you get to see some of the unadorned paper, which can often be quite beautiful if you've printed on fine-art paper. Matted prints are larger, which can be a benefit if you're looking for a bigger presence on the wall. It can also give the picture room to visually "breathe" within the frame.
Frame with mat and no margin
Similar to framing with a mat and margin, this method mats just over the edge of the print. The framer will need around a 3mm overlap between the mat and the print. They can actually use a smaller tolerance but it's more fiddly and they will curse you. Instead of signing underneath the print, you sign on the print itself - make sure to leave enough tolerance so the signature is clear of the mat. (Note if you sell prints with your signature in the margin, some customers will still choose to mat to the edge of the print and over the signature! Because I usually print-on-demand, I ask my customers if they have a preference).
Cons: If your print has a strong edge effect, it might be noticeable that the mat is cutting out some of the picture.
Pros: your picture may suit not having a white margin, e.g., if it's dark and moody, so matting over the edge of the print may be aesthetically more pleasing. It may also make it appear more painterly.
Frame with hidden mat or spacers
I now frame a lot of my prints with the frame to the edge of the print (usually with a hidden black mat or spacer), because it has a more painterly look. If you choose this style of framing, then you need to consider that due to the glass (which is about 2mm thick), when looking at an angle, you can see around 3mm past the edge of the print. If you have a dark print on white paper this is extremely noticeable. If I know I'm going to frame in this way, I make special prints with a "framing margin" where I extend the edge of the print with a reflected blur (similarly to how you'd do a gallery-wrap on a canvas print), a dark colour, or I create the picture in the first place with an extra 1cm or so of picture that the framer can use as tolerance. I also add crop marks to help the framer line things up.
Things to consider: you will need to sign on the print itself - make sure you give enough clearance so the framer doesn't overlap the frame and signature.
Things to consider: you will need to sign on the print itself - make sure you give enough clearance so the framer doesn't overlap the frame and signature.
Why does the frame cost more than the print?
Unless you're an artist in a league way higher than most of us, framing will cost you and your customers more than the print. The reality is that a print is simply some ink and thick paper, which is way less costly to manufacture than wood and glass.
What next?
I hope this hasn't scared you off exhibiting - the first one is the hardest but it's a fantastic experience and you will learn so much. As I said at the top, if you treat framing as an extension of the art and the creative process, you will likely find it easier to make decisions as the art and your vision will determine the direction you go.
I'm sure there are many more questions, so please ask away in the comments and I'll do my best to answer them (or reach out to my framer friends!) and update this blog accordingly. And likewise, if you have exhibition hints too, please share the love and add them to the comments.


7 comments
All the best with the big move!
Judi