TinyArt - Behind the scenes
TinyArt creation is keeping me super busy this month as I prepare for a November–Christmas release as well as stocking up galleries. I was thinking you might like to find out more about what goes into making a TinyArt piece and how this eco-art project came about. Read on to find out how much quality framing materials we've saved from the landfill…

Four years ago the TinyArt project burst into life. I'd won a weekend course with The Learning Connexion and chose to do their framing course – so much fun! I signed Linton up too, and we spent the weekend framing all sorts of pieces using offcuts. We learned how to use all the manual framing tools from the huge and scary guillotine to the under-pinner that joins each corner. We cut glass and matboards – the whole shebang! Amazingly no fingers were lost.
What was quickly apparent, though, is how much easier it was with the right tools for the job. Making a frame from scratch at home is doable, but not practical or cost-effective to do at scale without a workshop. But I'd gotten the framing bug! I'd also noticed an unfilled niche in many galleries for affordable but high-quality framed art prints. My brain started buzzing with ideas…

So I approached my good friend and framer at Edges Art + Framing, Chris Helliwell, about a collaboration. I proposed that Edges make frames for me from their offcuts, and I'd do the mounting and finishing. I did need to acquire some hand tools, like a manual mat cutter and point gun, but nothing like what I would have needed to create the frames as well. The catch — or, as I prefer to think of it, a “creative opportunity” — was I'd have no say in the frame mouldings. It would be a lucky dip. TinyArt was underway!

First, the Edges Art+Framing team goes through their offcuts and makes up tiny square frames, trying to maximize what they can get out of each piece. We go with square because most of my prints are square, and the frames are much simpler to make, needing just one measurement. I never know what I'm going to get! It all depends on what their customers are ordering. Sometimes, the trend is for plain black. Sometimes the world has gone mad for white shabby chic! I adore all the ornate frames that might be ostentatious in a big size, but somehow for TinyArt, over-the-top is just right.
Sometimes Edges will reframe a piece for a customer so they can upcycle the old frame using an old and interesting molding. There are often off-cuts from unusual, rare, and expensive frames that most of us would never think to choose or risk for a larger piece, let alone afford. With the plainer frames, I'll usually try to do something else special, like double matting, float-framing, or framing without a visible mat to maximize the print size.

Edges then go through their glass offcuts. They know I love antireflective glass, so the majority of TinyArt pieces use the fancy glass – some even use Museum-grade glass that is also 99% UV protective. All too precious for the rubbish bin.
Edges delivers boxes of TinyArt frames consisting of just the frame, glass, and backboard. Then I take over to do the mounting. As I unpack, I measure the size and make notes on the type of glass, as well as considering which print might be the best match. I have a shoebox filled with tiny acid-free tissue-wrapped prints that I've made from the bottoms of all my fine-art prints. I do most of my own printing, and most of my artworks are square, but the paper comes in rectangles. I can't bear to waste it so I try to print on as much of the sheet as possible!


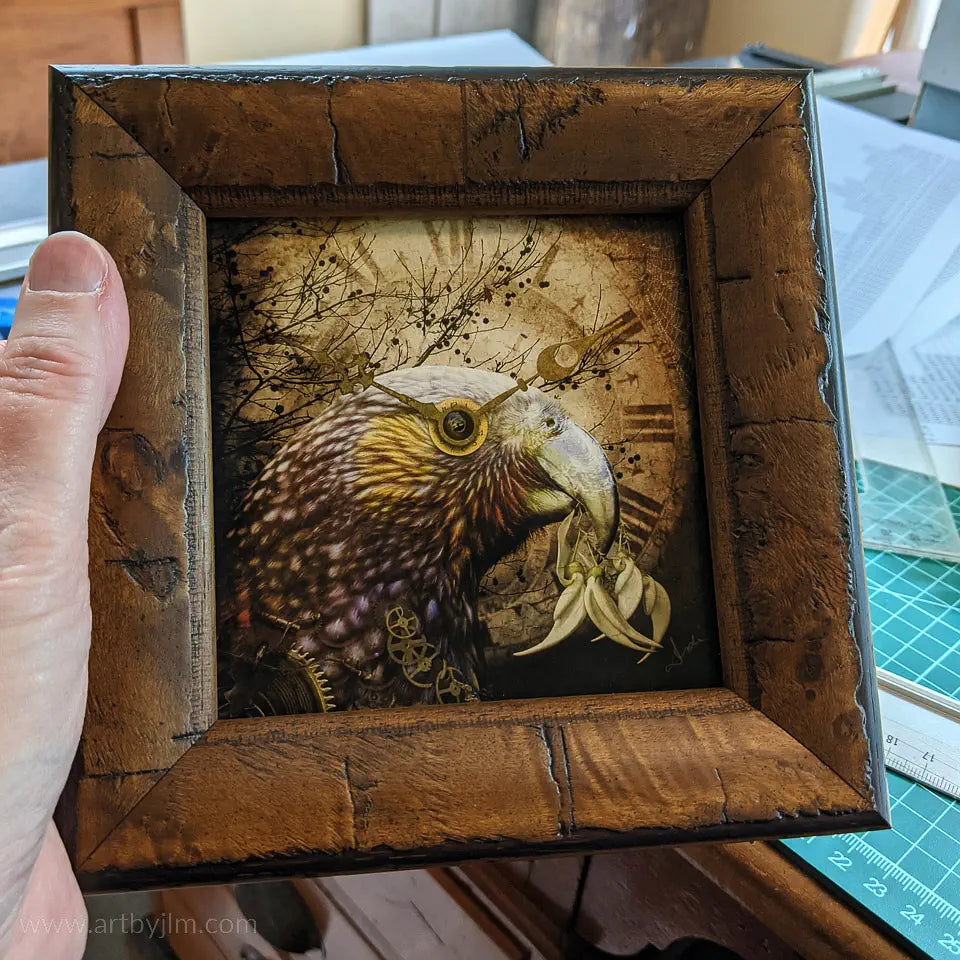
The hardest part is choosing which print goes with each frame. When there is a perfect match, it's such a buzz. Sometimes I'm left pondering how on earth I'll find the best match, but somehow the right combination eventually occurs to me. On occasion, the Edges team has seen how far they can push my creativity with some rather weird oddities, or by seeing if they can make a tiny frame using an extra-wide molding like the example above – I'm glad they're having fun too. By experimenting with hundreds of frames, I can now recommend interesting frames to customers for larger pieces with confidence.

Edges also give me boxes of matboard offcuts (matboard is the acid-free cardboard between the frame and the print). Think about it – every time a matboard is used to frame a print, there is a piece of matboard cut out to make the window. That piece can then be used to mount a smaller piece, and so on, and so on. I then compost the tiny squares of matboard left over from the smallest prints.

Matboard is imported and is quite expensive in New Zealand, so it's not so common for people to choose framing with double or triple matting where a strip of coloured mat surrounds the print with a plainer mat on top. But for TinyArt, all it takes is time. I love stacking matboards, sometimes of the same colour and sometimes multiple colours. The most I've managed to stack is 5 deep (imagine the expense of doing that for a full-sized piece!).

I also love to cover matboard with washi papers or hand-pulled gelliplate prints to give a unique look. That's something you simply won't find as an (affordable) option for regular-sized artworks, at least not with most framers. I treated myself to a deckle-edge ripper too. I sometimes embellish the prints themselves or paint the inner bevel of the mat window with gold or silver pearlescent paints.

All my mats are cut by hand using a Logan matboard cutter. I've only nearly sliced my thumb off once! Even for the TinyArts that don't appear to have a mat, I sometimes cut a hidden mat that fits in behind the frame rebate. This holds the print off the glass, protecting it and increasing its life. It's a lot of extra work to do this and a real fiddle to get it right, but I think (hope) the effort is worth it for the extra special pieces.
Framers will use plastic spacers to do this, but there are not usually off-cuts to use for TinyArt purposes. A spacer made from upcycled matboard offcuts is more fitting for this project. Though I do sometimes use plastic spacers if I want to lift or recess the print to create a floating effect.

I use all new supplies for taping, hinging, stapling and hanging, as there are no realistic upcycled or recycled options. On the back, I put a label with the name of the piece and its unique catalogue number. There is also a label or note about what sort of glass is used and a sticker if the piece includes a 10% donation to conservation (most do).
As I go, I photograph the inside, back, and front of every piece (likewise for all my prints), so my phone camera roll is 90% TinyArt and prints – and that’s where most of the photos in this story have come from.


Four more framing variations for "Sweet Dreams" - which is your favourite?
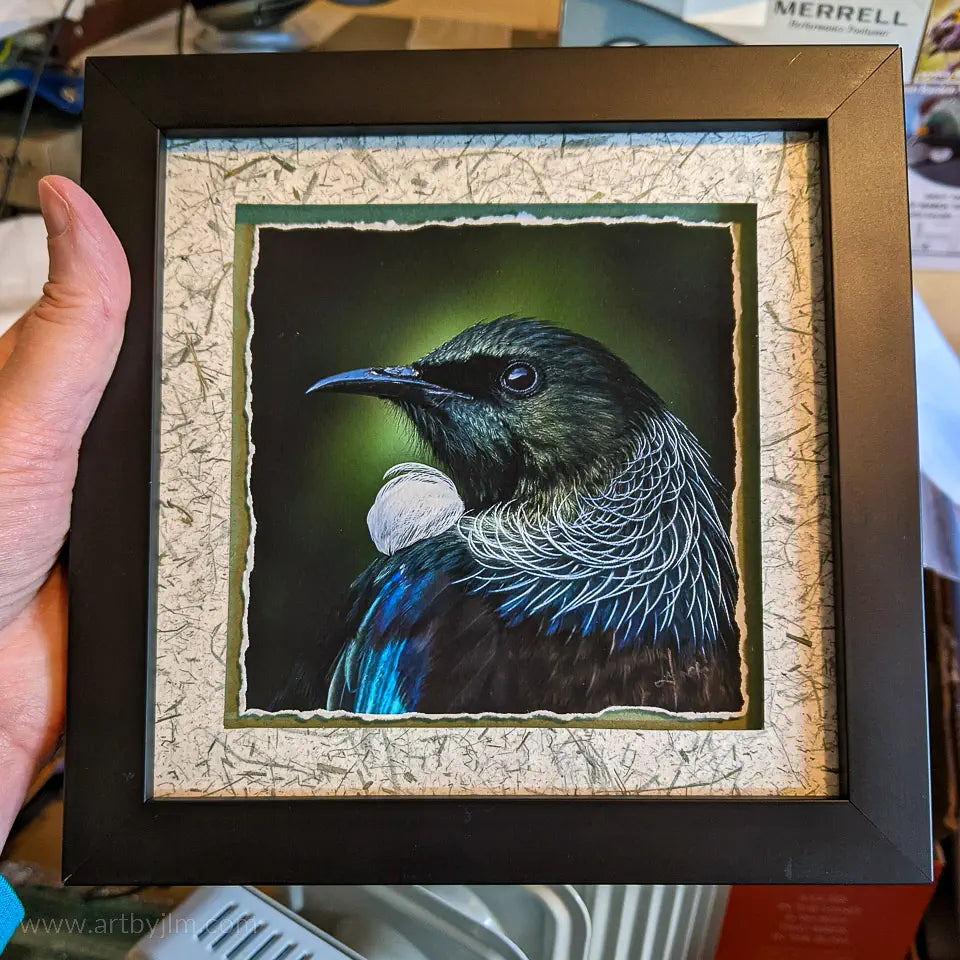
Over time, I've found that some of my prints are beloved as TinyArt pieces yet others don't get much traction. "Sweet Dreams (ruru)" is an absolute favourite and also suits many different frames. "His Resplendence (tūī)" and "A New View (tūī)" are also popular choices, and are also the only way to now get hold of these prints which are either sold out or nearly sold out of their larger-sized limited-editions. I don't release limited edition prints smaller than 18×18 cm and TinyArt frames are usually smaller. So all the TinyArt pieces are open edition prints, and there is no restriction on how many I can make.
As of 22 Oct 2022, I've made 566 TinyArt pieces. Doing some back-of-the-envelope calculations, the average TinyArt piece has outside dimensions of about 20 cm and a glass size of about 12×12 cm. That translates to over 450 metres of expensive frame moldings and 8 square metres of fancy glass, matboard, and foamboard that haven't gone to landfill! It's also (hopefully) over 500 people with smiles on their faces because they have some beautiful art in their homes or offices.
The TinyArt project brings me great joy, despite the workload. I'm too slow at mounting to cover the cost of my time, and I don't tend to create a production line because I like putting unique touches on each. But I love being able to keep quality products out of the landfill, and I love being able to create a piece of quality art that is affordable, albeit tiny. TinyArt is perfect for people with limited space, fixed budgets, and for gifts as there is no need for the recipient to have to frame their art. Some people are also creating collections either on shelves or as a feature wall statement. One thing I've noticed, too, is that a large percentage of TinyArt customers are buying these pieces as a treat for themselves – that brings a smile to my face!

Favourite hashtags:
#tinyart #tinyartproject #buynzmade #ecoart #greenbiz #handmade #upcycling #lesswaste
Formatting and grammar updated 3 June 2023; slightly updated 23 Jan 2023; originally published 22 Oct 2022.


5 comments
Absolutely fascinating!
Such special pieces. I love mine and have also gifted one to a very special person.