How to increase the odds of a great bird photo in dappled light
-
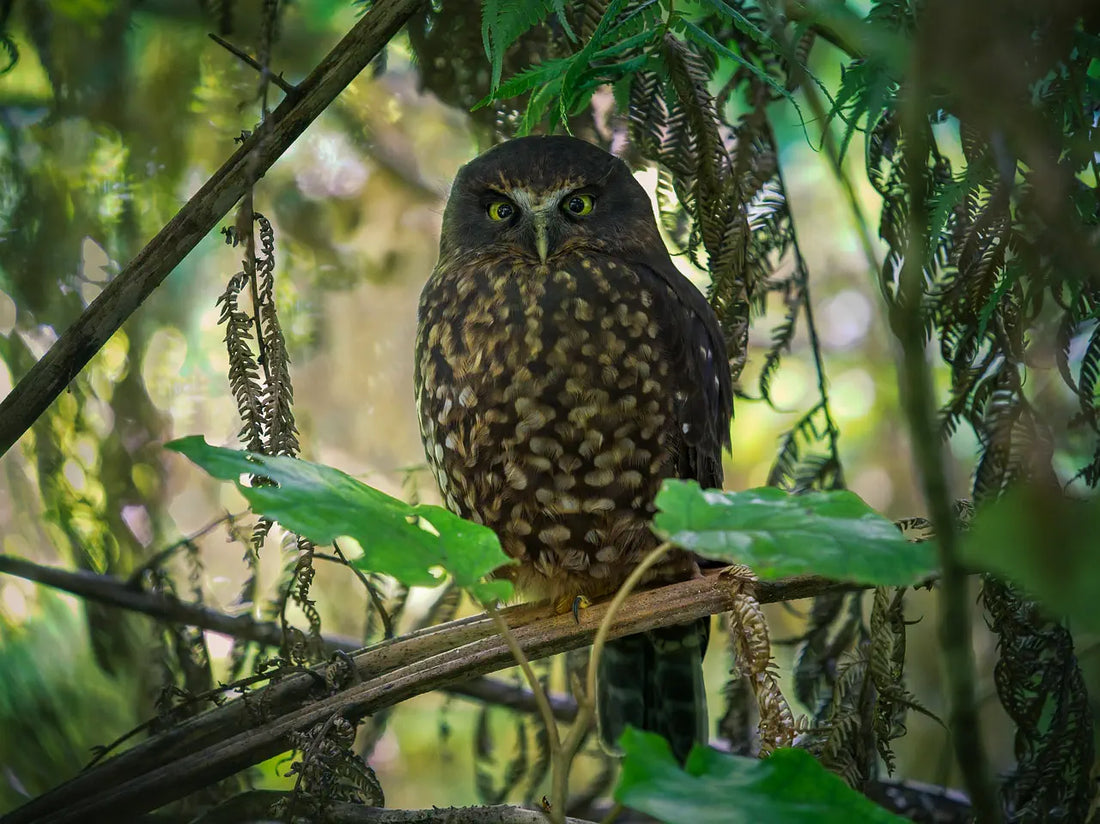
Before editing. Sony A1+100-400 G-master zoom: 348mm, 1/80s, f/5.6, ISO 6400, -1EV uncropped
-
After editing


A difficult photo of a gorgeous ruru - check out these before and after edits. The original photo was taken through a tiny sightline in the foliage at ground level in dappled light. This was the best I could manage given the conditions - yes some laundry is now needed!
Even with the best gear, it's HARD to get a great bird photo in the forest. The light is usually low and can also be dappled with harsh highlights and dark shadows. Recently, Zealandia EcoSanctuary asked me for my best tips for photographing in these circumstances. If you've not been to Zealandia, it's a deep valley running roughly north-south so there is little-to-no early and late low-angled daylight and there is a lot of scrubby bush that gives dappled light. There are, however, many rare and endangered birds that we're all keen to photograph!
A lot of folk turn to flash photography to get enough light. I'm anti-flash for most bird photography. It's not good for the birds, especially those with sensitive eyesight, and it usually looks unnatural anyway.
A lot of folk turn to flash photography to get enough light. I'm anti-flash for most bird photography. It's not good for the birds, especially those with sensitive eyesight, and it usually looks unnatural anyway.
Instead of flash photography, there are a variety of things you can try. Some are free and some cost money. Some are practical and some are technical. My favourite advice is always to focus first on the free and practical things. Only once you've exhausted those options should you consider opening your wallet.
MOVE YOUR FEET (AKA SNEAKER-ZOOM)
Free and practical
Move your feet and try for a different angle. I can spend as much effort looking at the background as I do the subject to see where the highlights and shadows are falling (not to mention distracting leaves and twigs). Do consider getting down and dirty - I find it better to sit on my bum in the dirt and save my knees (and weatherproof pants are the best things since sliced bread!).
-
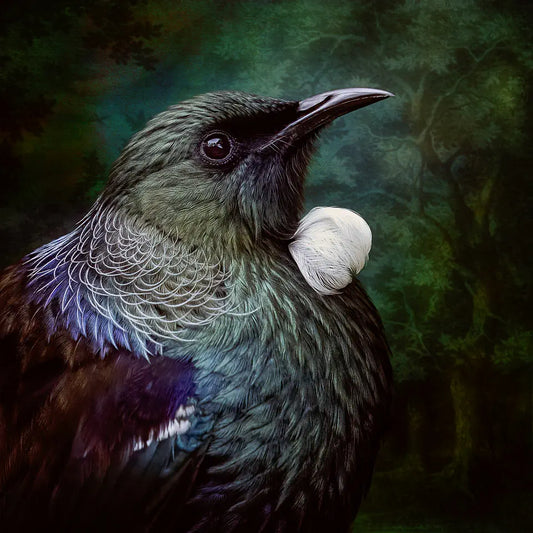
Bright, dappled light that varied as the wind blew confused the exposure algorithm in the camera. This is a colour photo, but has blown out in both directions.
-
The same tūī and same tree (different angle) on a bright but drizzly day giving lovely soft light, plus a wee bit of post-processing.


CHOOSE YOUR DAY
Free and practical
You're unlikely to see me at Zealandia on a bright sunny day! Increase your chances of success by visiting on overcast days and in the early morning or late afternoon when the light can be softer (and the birds are often more active). Some of my best photos were taken on days with soft misty rain.
It may take repeated visits to your favourite location to learn what times of day and season work best, as the sun's angles change throughout both the day and over the year.
It may take repeated visits to your favourite location to learn what times of day and season work best, as the sun's angles change throughout both the day and over the year.
EXPOSE FOR THE BIRD
Free and technical
Dappled light can confuse your camera's auto-exposure settings, causing an under-exposed silhouetted bird or over-exposed blown-out highlights. The answer is to expose for the bird rather than the background (spot-metering). You can more easily compensate for an incorrectly exposed background in post-processing, but it is much harder to compensate for a poorly exposed bird.
There are hundreds if not thousands of tutorials already out there on how to do this, and probably for your specific camera too, so I suggest googling the specifics.You can also use your exposure compensation dial to tweak what your camera is trying to do automatically. Or take the plunge and learn how to set your exposure manually. With a manual exposure, you can set and forget and focus on the composition - it's quite liberating once you get the hang of it.Don't consider buying better gear until you've mastered the basics of the gear you have.
INCREASE THE LIGHT SENSITIVITY (ISO)...
Free and technical
Increase the ISO setting in your camera so that the sensor is more sensitive in the low-light conditions. Like all things to do with photography, this comes with a trade-off. The image will be noisier/grainier. But this is always better than having a photo with motion blur (unless that's what you're going for).
-
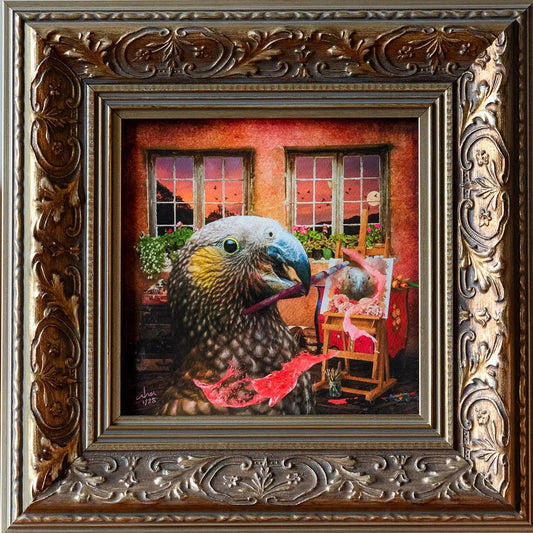
High ISO close-up of a kākā's eye
-
Then after de-noising with ON1 NoNoise AI


...AND USE DENOISING SOFTWARE
Costs $ and (only slighty) technical
I personally hate the grainy look, but many use it to great artistic effect. I use denoising software to improve high-ISO images. Denoising has become so good in recent years, it feels like magic. Noise is removed without sacrificing too much detail. Choose from ON1 NoNoise AI, Topaz DeNoise AI, and DxO for top-of-the-line noise reduction or use the inbuilt denoising in Lightroom or Photoshop. My current go-to is ON1. Use the slider on the photo above to see a before and after using ON1 (ISO 6400, heavy crop). Worth every cent!
USE POST-PROCESSING EDITING TECHNIQUES
Free/Costs $ and can be technical
Photoshop, Lightroom and free alternatives like Gimp gives a world of post-processing options to edit your images. As an example, the ruru at the top of this story was first de-noised and then quickly edited in Lightroom for some basic adjustments and to emphasize the eyes. I then took it over into Photoshop to fill in the overblown highlights using a mix of masking, healing, clone-stamping, and brush work. Once you have these skills in your arsenal, these sorts of edits can be done within minutes and can rescue many flawed photos. Again, there are thousands of tutorials out there on the internet on how to do all these things. I highly recommend Julienne Kost's tutorials from Adobe for Photoshop and Lightroom editing - she's amazing and many of her tutorials are free.
This is considered a "light" lens and camera, at only 3 kg... I don't dare say how much it was... But oh my, does it take a lovely photo!
GET THE GEAR TO DO THE JOB
Costs $$$ and practical
There's a reason serious bird photographers carry around gear the size of a small child that looks like it could find life on Pluto. It does the job. Those huge lenses with wide apertures let in lots of light, allowing shooting in otherwise untenable situations. But gear like that comes at a huge cost - both financially and also physically. If you're in a position to buy it and can carry it (or you have a handy sherpa!), you won't regret it. But do try all the other suggestions first so if and when you do get the good gear you can get the most out of it.
AND LAST OF ALL, ALWAYS CONSIDER THE WILDLIFE FIRST
When you're fussing around with your camera and angles, don't forget to mind the wildlife and their home! Always be prepared to abandon the shot if it means protecting the critter.
Birds and other critters show stress in different ways to humans and what might seem innocuous to us, may not be to them. For instance, they might freeze rather than fly, their heart-rates sky-rocketing and cortisol levels shooting up, waiting for you to bugger off. But to you it might look like they're sitting there unbothered. There can be telltale signs though, depending on the species, so do your homework too. Be especially careful when photographing a nesting bird - if they get too stressed they may abandon the nest.
And it's worth repeating, when it comes to flash photography, I never use it with birds. Even if it was OK to use, the resulting images rarely look natural with harsh shadows and light coming from the wrong direction, so it's just not worth it. Some cameras and mobile phones are set to automatically flash when the light is low, but this feature can and should be turned off. It's far better to choose when flash is needed and turn it on specifically.
What have you found increases your odds of a great bird photo?
6 comments
Thanks Judi, great tips. I learned about spot metering last year and it has been the single best thing to improve my bird photography. I also have Topaz DenoiseAI and SharpenAI which I team up with GIMP.
I am seriously jealous of your kit, but it is the weight rather than the cost that holds me back. I’m not sure if I could hold it steady. My current kit comes in at 1.5kg and as I write this I’m reminding myself that what found it extraordinarily heavy when I first got is not even noticeable now. Hmm, maybe I should start looking at that 600mm lens.